| Plastics News |
Digital X-ray measuring technology in the production of hoses and tubes
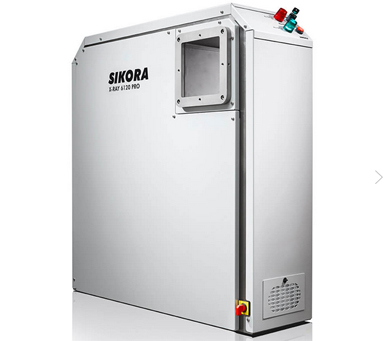
by Dr. Hilmar Bolte, Research & Development Head of Analysis, Sikora AG Since 1993, Sikora AG has been providing digital X-ray measuring technology for non-contact online measurement of diameters and wall thicknesses in cable production. In 2003, the product portfolio was broadened to the hose and tube industry. Meanwhile, more than 2,000 Sikora X-ray measuring devices are in operation worldwide. From time to time, however, the potential of the principle is underestimated. Often even reservations against X-ray in general exist, partially influenced by referring to radioactive radiation. Contrary to this, X-rays can be turned off when not in use. Furthermore, products which are measured by X-ray are not contaminated by radiation - meaning that they do not radiate further. Even when in operation, the devices are safe from radiation and working in close vicinity does not bear any risk, even long-term. This ensures a safe and smooth handling of this technology. X-ray is known as imaging technology in medical diagnostics. In general, two dimensional images are generated, allowing the doctor to look into the body of the patient. It is displayed in grayscale, resulting from the different absorptions of the X-rays when traveling through the body of the patient. For X-rays, materials have a different transparency. Due to these differences in transparency, it is possible to see where the material begins and where it ends. Tissue, for example, is more non-transparent for X-rays than the bones embedded therein. The same applies when using X-ray in measuring technology. It allows for a non-destructive look into and through a product. Furthermore, it can be differentiated between miscellaneous materials that vary in their absorption or attenuation of X-rays. The absorption of a material is defined by its composition, its density and hardness of the used X-rays. Advantages of X-ray technology In particular, when comparing X-ray technology to mere optical methods, it provides several advantages. Due to its low density, gases that arise during the production process, such as smoke or steam, do not interfere with the measurement. The temperature of the object to be measured is also irrelevant for the attenuation and, thus, for the measuring result. For X-ray measuring technology, the measuring result is stable and constant after the start-up of the device and the operation point has been reached. There is no warming up phase or a dependence on the product temperature, no coupling media is needed, nor any requirements regarding their quality. A correction or recalibration of the measuring values during production is also not required – neither manually, nor by including secondary values such as a gravimetric measurement. This is a significant advantage in comparison to other measuring methods. The stability of the measuring value and, therefore, the repeatability are significantly better compared to other methods and do not degenerate over the lifetime because there are no moveable parts in use. There are no moving sensors, which have to be adapted to the product and, thus, changeover times do not occur. In general, these characteristics suggest the application of X-ray measuring technology for online control of the extrusion of hoses and tubes. Not only the resolution of single layers is possible, but also the presence of electric conductive additives in the materials (for example soot or metallic layers) or of ply do not represent an exclusion criterion. Functional principle The X-ray measuring devices work with X-ray transmission, meaning that the X-ray source and the X-ray camera are facing each other from the opposite sides of the product. Depending on material and thickness of the product, a part of the X-rays is absorbed by the material and the other part is transmitted. Intensity profiles are visible on the camera, which show the attenuation of X-rays by the material. This attenuation is occurring exponentially as it traverses material, thus, the intensity captured by the camera also decreases exponentially. The attenuation coefficient is dependent on the material and the density of the X-rays. Thereby, a “bend” in the intensity curve occurs at X-ray transitions from one material to the next one. By using a multi-layer model based on the underlying physics, the exact position of the transitioning from one material to another can be determined. Hence, with this approach and a geometric model of the product to be measured, the diameter as well as the wall thicknesses can be determined by optimizing the underlying model parameters. Not only individual information is being processed – as is the case for traditional measuring methods (such as level detection or impulse duration, etc.) – but the camera image as a whole is being analyzed. Hoses or tubes are transilluminated entirely by X-rays due to the absence of a metallic core – contrary to measurements in the cable sector – which would absorb the X-rays. The key advantage is that, regarding their parameters, all imaging elements in an X-ray measuring system are determined precisely and in context – for example, the positions. For this reason, the measuring points stand in relation to each other, which allows for statements about the whole 360 degrees of the measured product. For instance, the minimal wall thickness can be determined precisely and freely over the full circumference. This also allows for conclusions about the positioning of a twisted product at the extruder. The direction to adjust the screws at the crosshead is fixed. When the product turns on its way to the measuring point, a rear projection of the wall thicknesses to the crosshead and, therefore, an allocation of the eccentricity to the adjusting screws is required in order to make the appropriate adjustments. This is only possible when a 360 degree model is available. This is also the reason why well-known plant manufacturers for self-centering crossheads refer to X-ray measuring technology. Conclusion In summary, the application of X-ray measuring devices has many advantages for the production of hoses and tubes that other measuring methods cannot offer. The independency of coupling media, the object temperature and the insensitivity to optical interferences of the measuring environment by steam or smoke is a unique selling point for this technology. Another point is the instant and constant generation of measuring values that are not based on secondary measurements. In addition, a recalibration is not required as there are no movable parts. By using a physical model for the absorption and the knowledge of precise and individual device geometry, statements about the entire circumference of the product can be made. This allows for a determination of the minimal wall thickness over 360 degrees of the circumference. All these points do not only ensure the highest product quality, but also the optimization of product processes and, therefore, a significant increase in efficiency. Sikora AG was founded in 1973 and is today a leading global manufacturer and supplier of measuring and control technology for the wire and cable, hose and tube, sheets as well as optical fiber, metals and plastics industries. With around 300 employees worldwide, 14 international offices and more than 30 regional representatives, the company provides customers with innovative product solutions and individual service. The measuring and control systems are exclusively made at the headquarters in Bremen/Germany. Source: Sikora
|


